Wednesday, July 30, 2014
Book Club Change Up!
Hey guys! I just wanted to let you know that we have changed the August book club from "All Fall Down" to "Goodnight June" by Sarah Jio. Sorry for the late notice! Cannot wait to discuss "Goodnight June" with you on August 30th, 2014! Thank you!
Tuesday, July 29, 2014
Index Card 3 Process Video
Here's another index card mixed media style project for you guys! Thanks for watching!

Monday, July 28, 2014

Friday, July 25, 2014
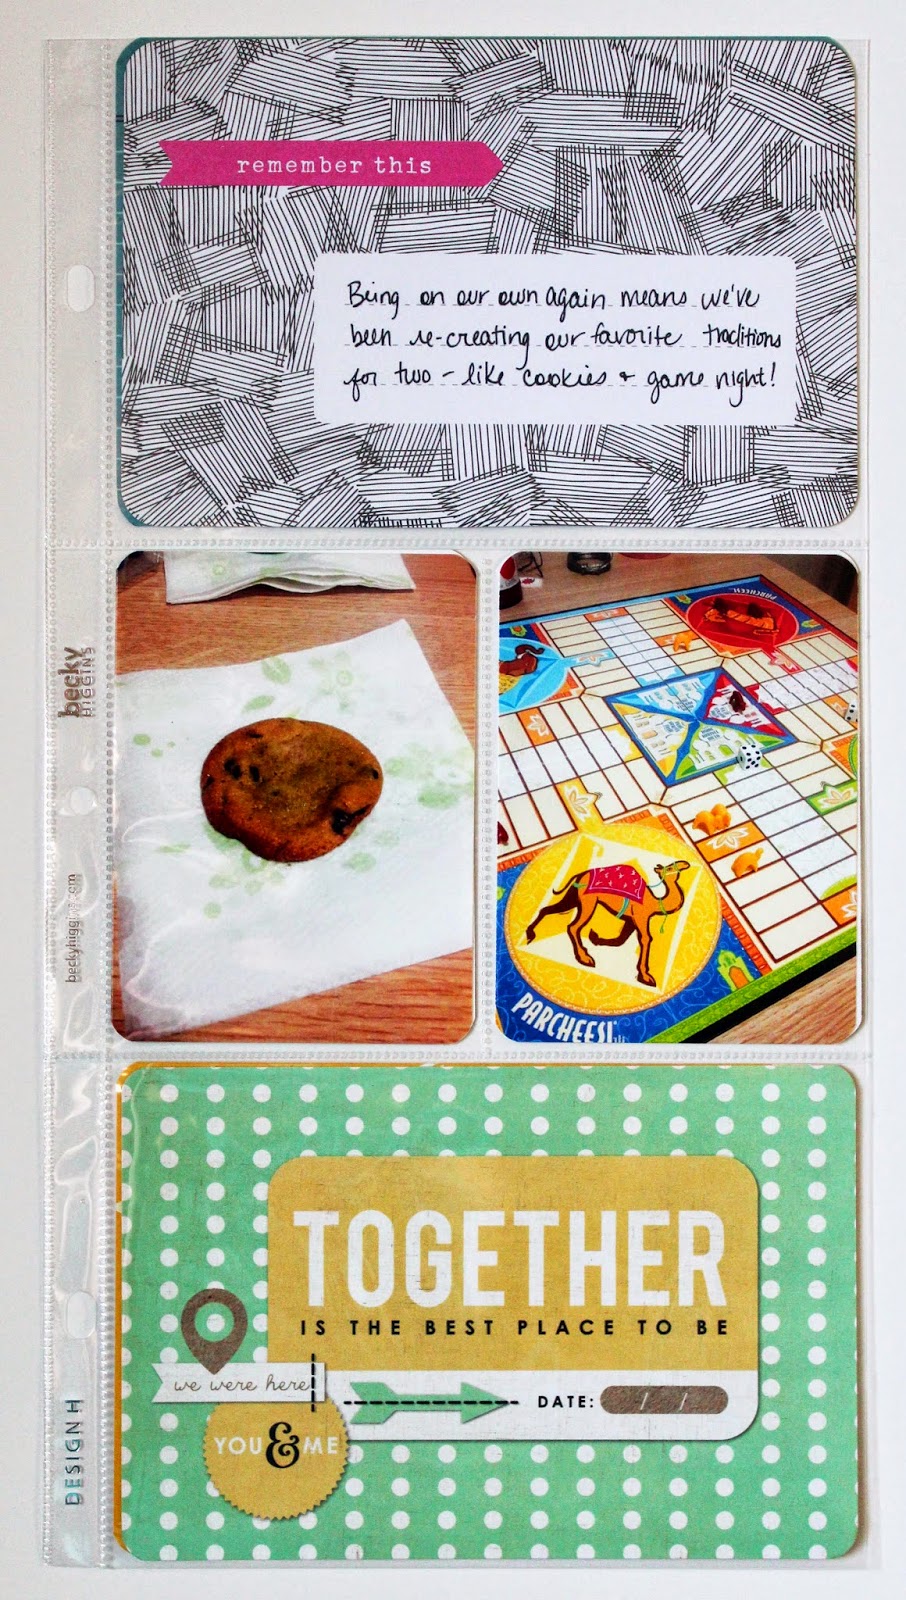
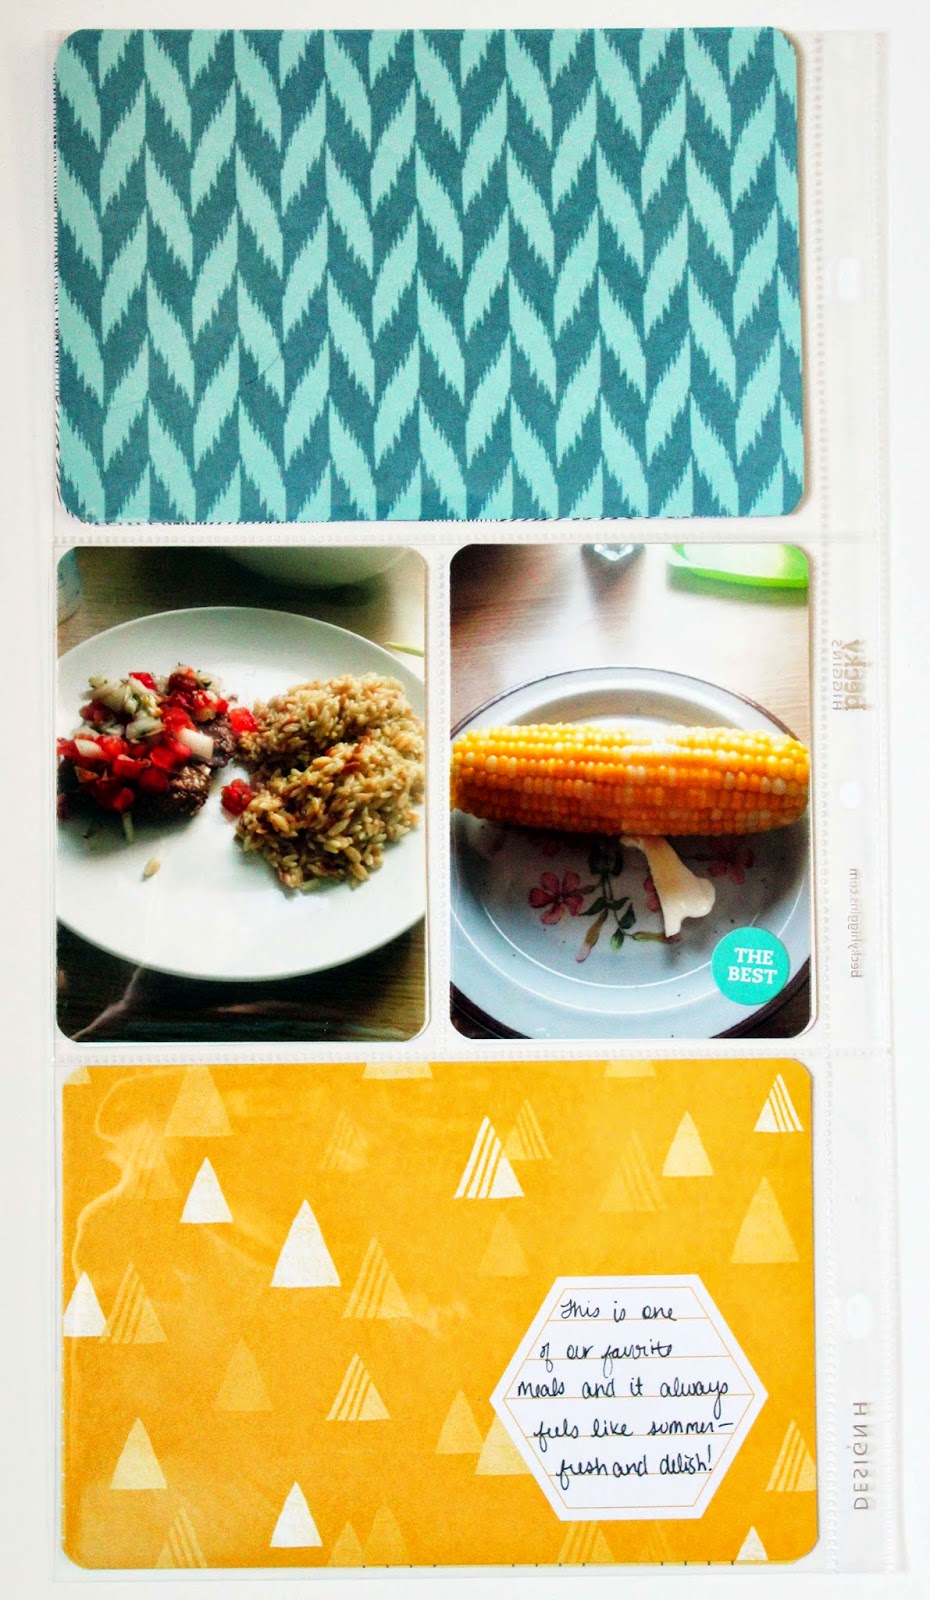
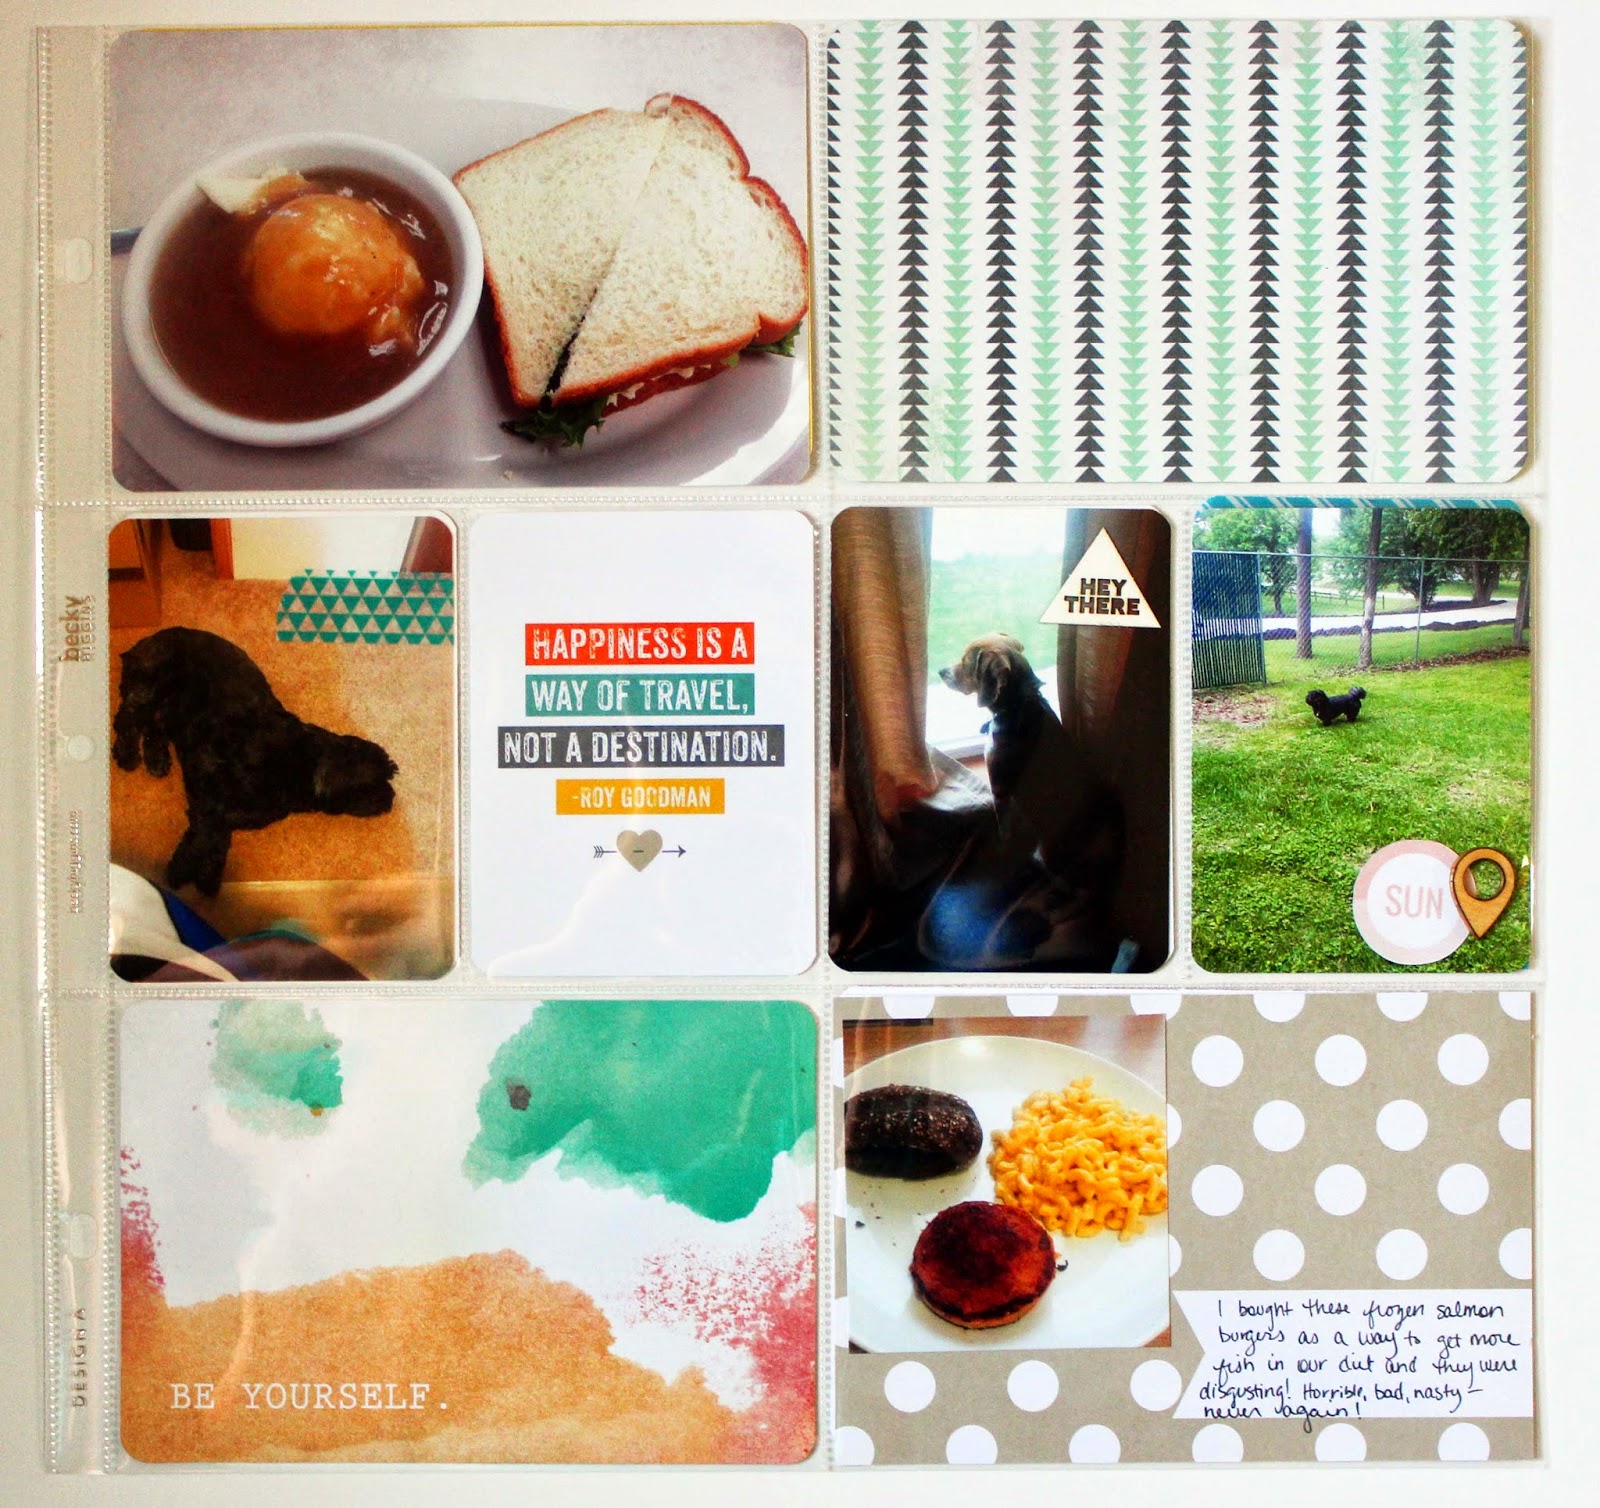
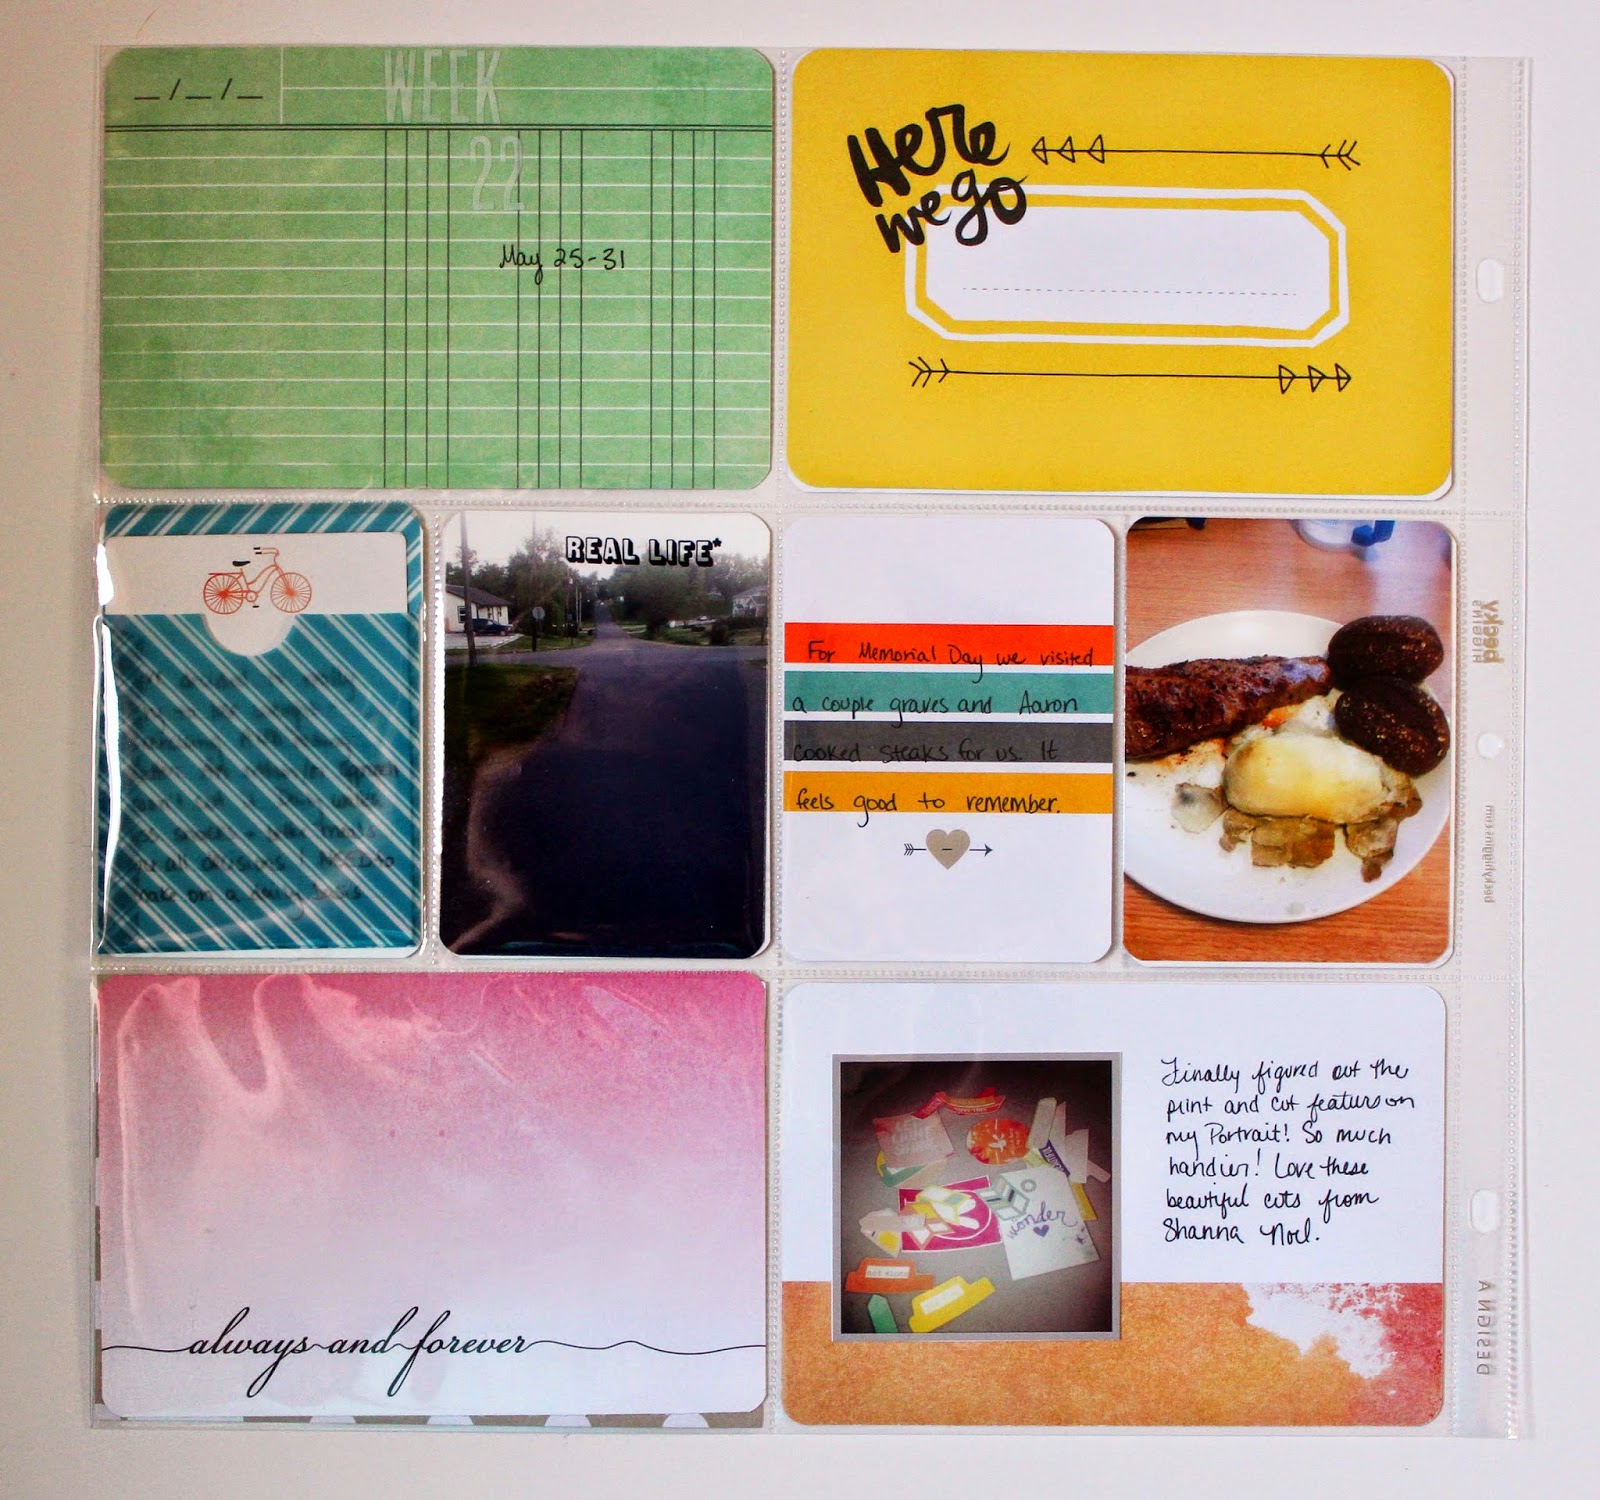
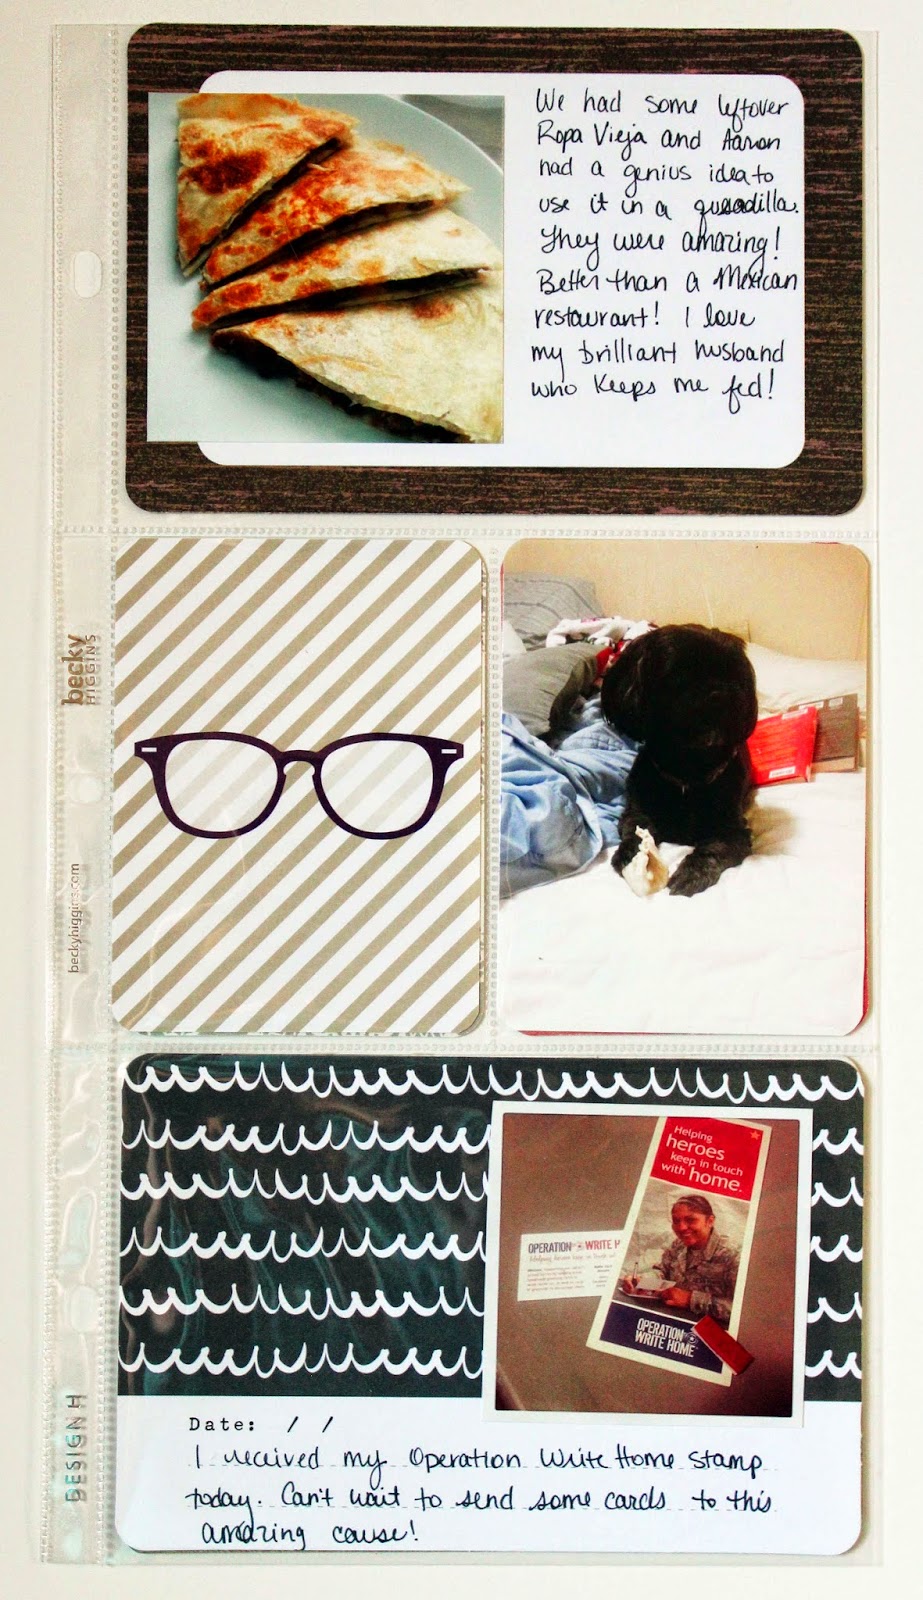
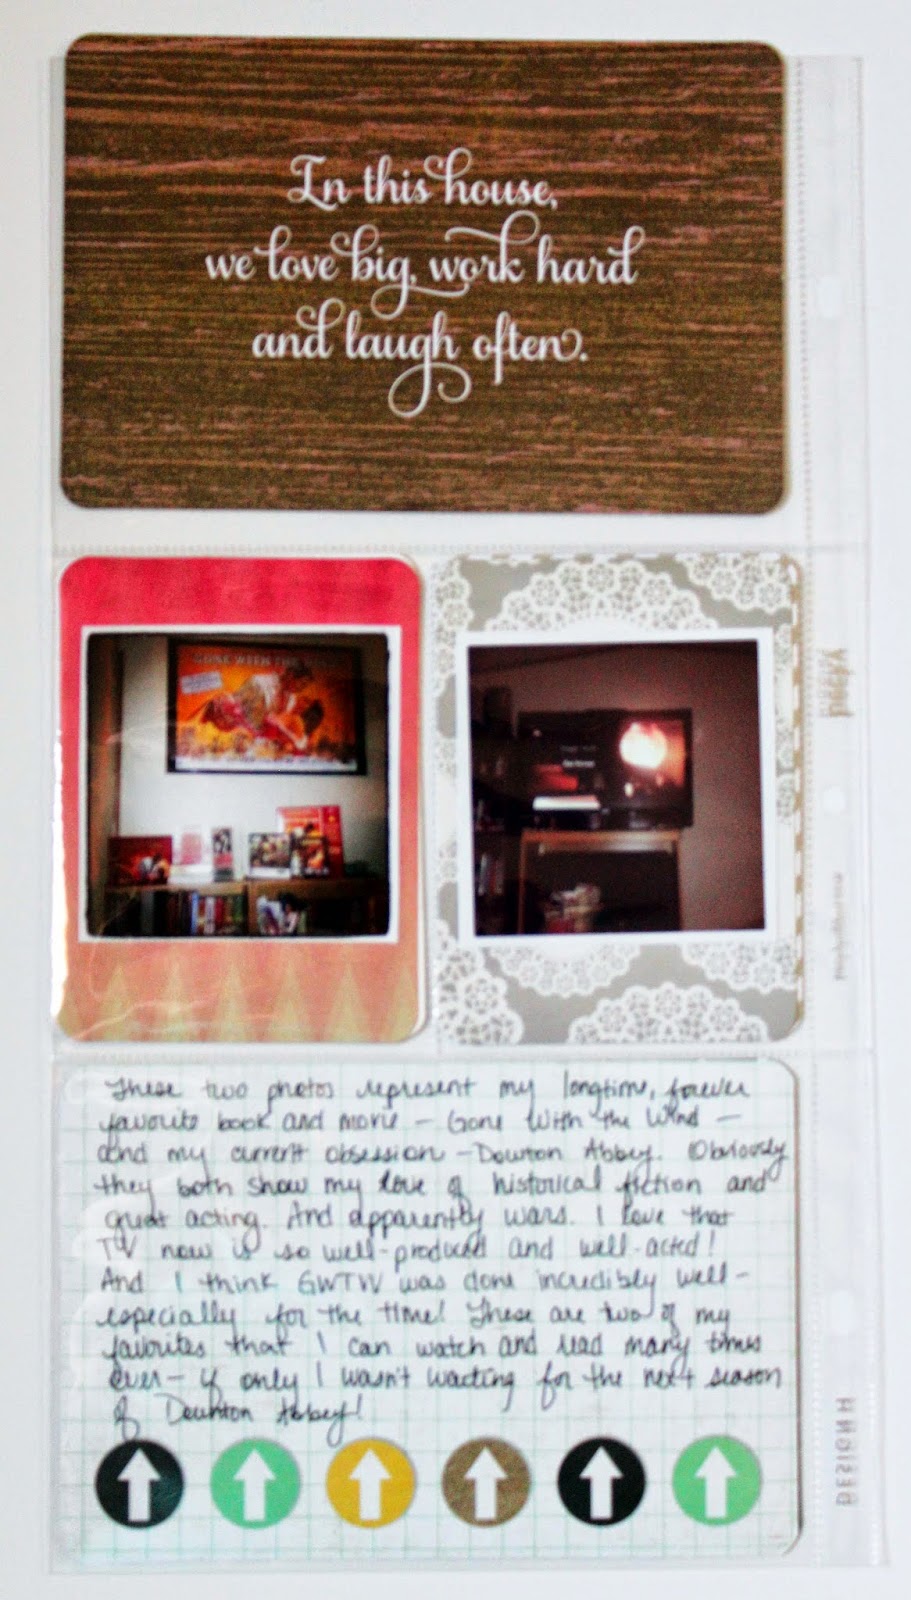
Project Life Blog Hop!!! Weeks 21 and 22 Process Videos
I am so excited to be part of Katina's blog hop again! I am so glad she invited me! As you may know, I am really behind on Project Life--from finishing up videos, to doing Project Life, to sharing them with you guys. So this week, I decided to really play catch up and share with you two layouts! They both had inserts but they also came together really quick! You can see the videos below and make sure you head over to YouTube and subscribe to my channel if you want to see more fun videos soon! I'll also be hosting a giveaway this week on YouTube and Instagram so come find me at either location--links to both of those can be found on the right hand side! Thanks so much for watching and don't forget to check out the other ladies in the blog hop!
LOVING LIFES LITTLE BLESSINGS www.

LOVING LIFES LITTLE BLESSINGS www.
LOVING LIFES LITTLE BLESSINGS www.
Here are those links again! Thanks so much for watching and have a great weekend!
Monday, July 21, 2014
Hello Sky Layout Process Video
When I saw this layout by Paige Evans, I knew I had to have the kit (the Clover add-on from Studio Calico in April or May). And I knew I had to re-create it!

So, that's what I did. When I re-created mine it had been a few months and I just remembered the lovely die cut and the sky vellum. When I looked back at our layouts, I laughed when I saw they were even more similar that I had set out to make them! My die cut is smaller because I have the Silhouette Portrait which only cuts up to 8.5 inches wide. But I love the way my layout turned out! Thanks so much for watching! There's a photo below!

Friday, July 18, 2014
Index Card 2 Process Video
Hey everyone! Here's a process video for another index card that I did using that adorable tissue paper that came from my Altenew order. There's a photo below the video! Thanks for watching!

Sunday, July 13, 2014
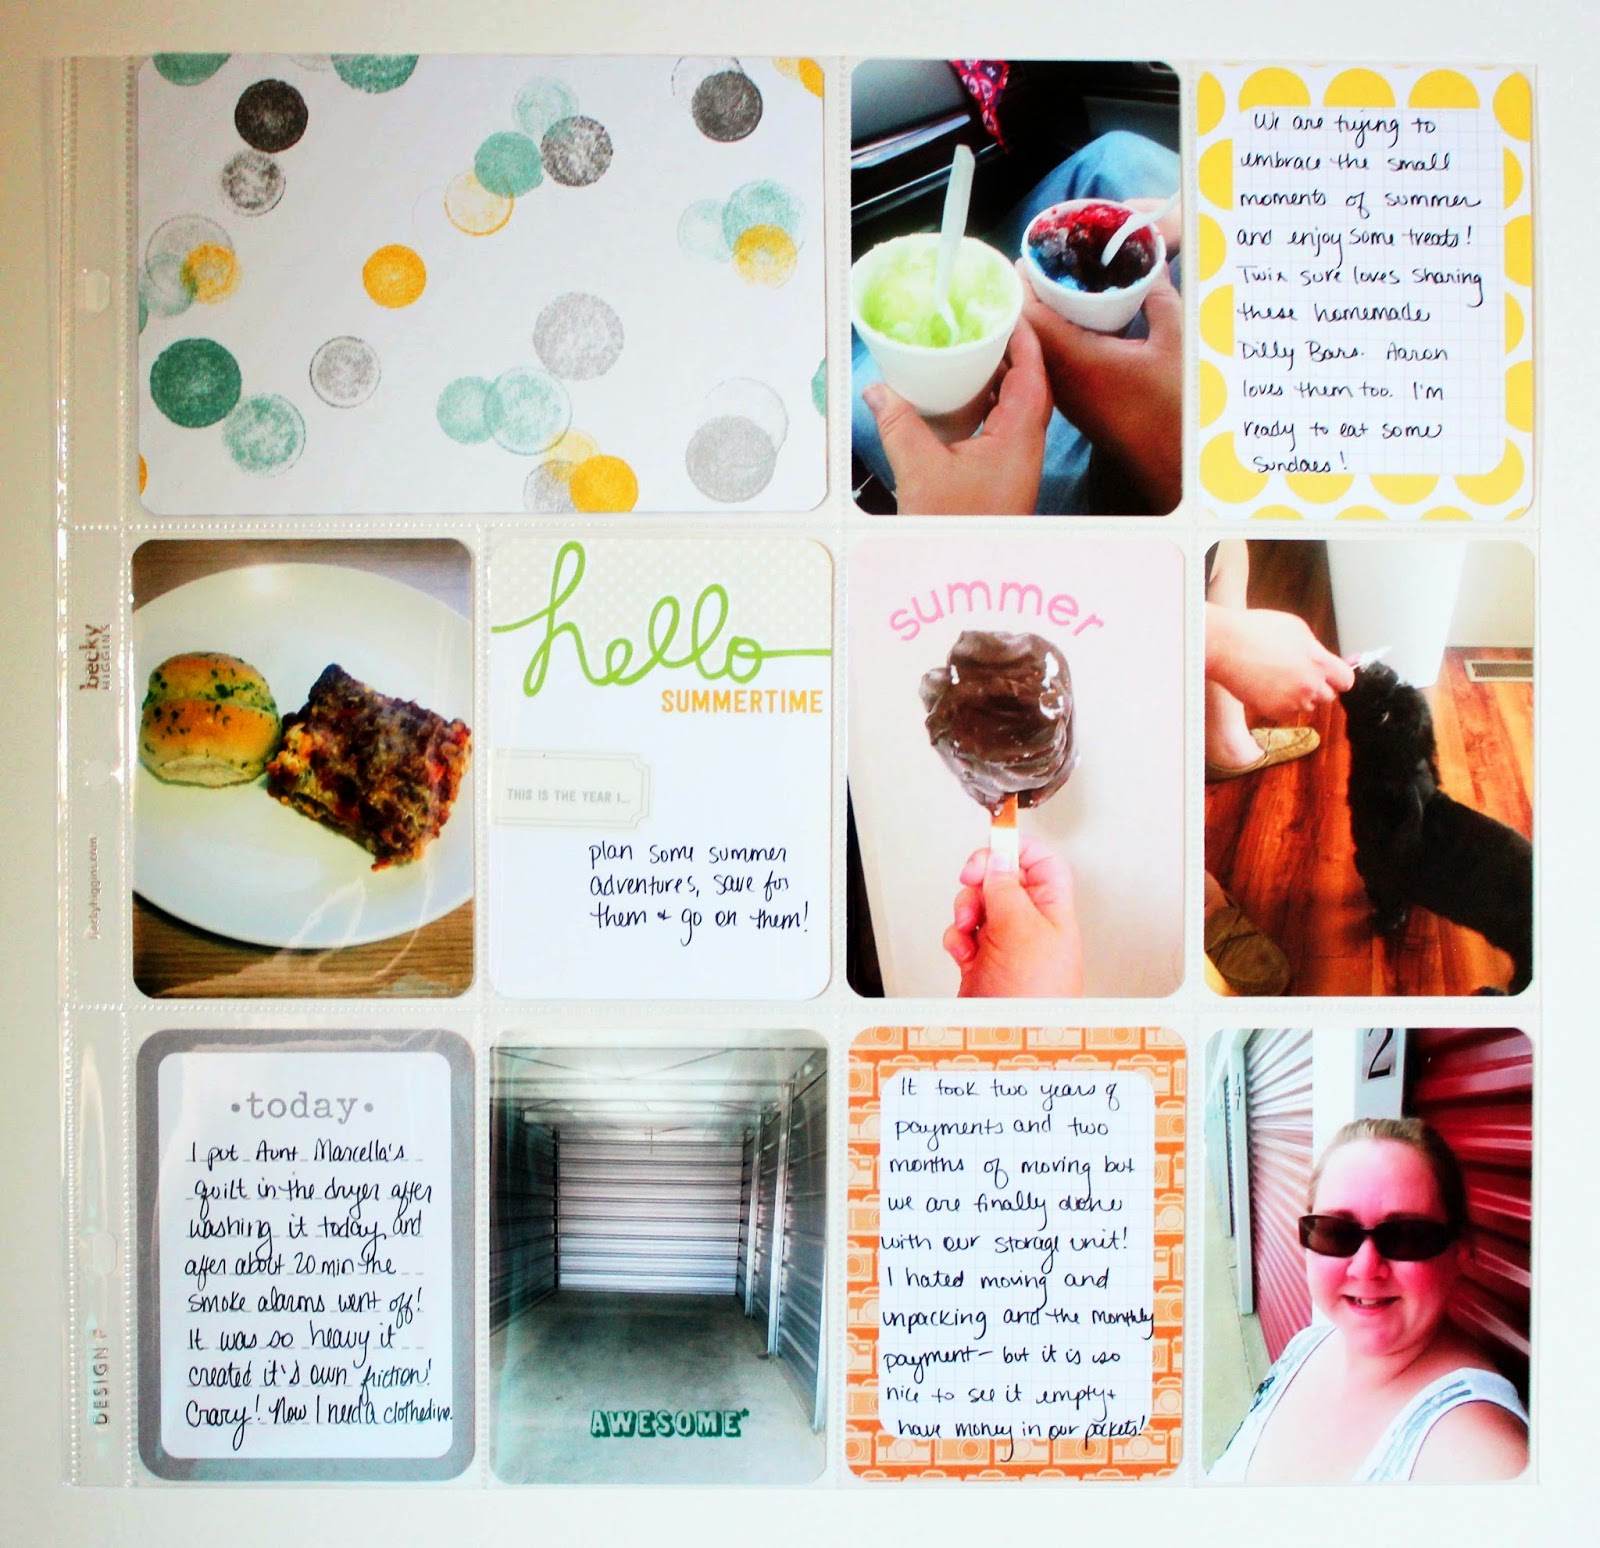
Project Life Week 20 Process Video
Just wanted to pop in and show you guys my Project Life for week 20. I am getting more and more caught up each week! I put pictures below! Thanks for watching!


Friday, July 11, 2014
Wednesday, July 9, 2014
Hello Bag Process Video
Here's a quick video of a bag that I embellished with some easy stamping. I hope you enjoy and thanks for watching!

Thursday, July 3, 2014
Project Life Weeks 18 and 19 Process Video
Hey guys! Here is my process video for my Project Life spreads from weeks 18 and 19 which I combined. Below the video are some photographs of the layout. Thanks for watching and have a great weekend!


Wednesday, July 2, 2014
Index Card Fly Video
Hi everyone! I just wanted to share with you an index card that I made using a mixed media style. I got this idea from Mixed Media Jenn over on YouTube who is following along with a challenge called Index Card a Day, also known as ICAD. If you want to learn more please check out the Daisy Yellow blog. Here's my first attempt at making an index card, even though I won't be doing one every day, it's so much fun that I'll probably continue to do them long after July is over.
Also, if you want to see some of the new Stampin' Up! Project Life items, I have a video up over on YouTube. Check it out if you want to see an accessory pack and a full set of cards. Thanks and have a great day everyone!
Also, if you want to see some of the new Stampin' Up! Project Life items, I have a video up over on YouTube. Check it out if you want to see an accessory pack and a full set of cards. Thanks and have a great day everyone!
Tuesday, July 1, 2014
Fourth of July Door Decoration
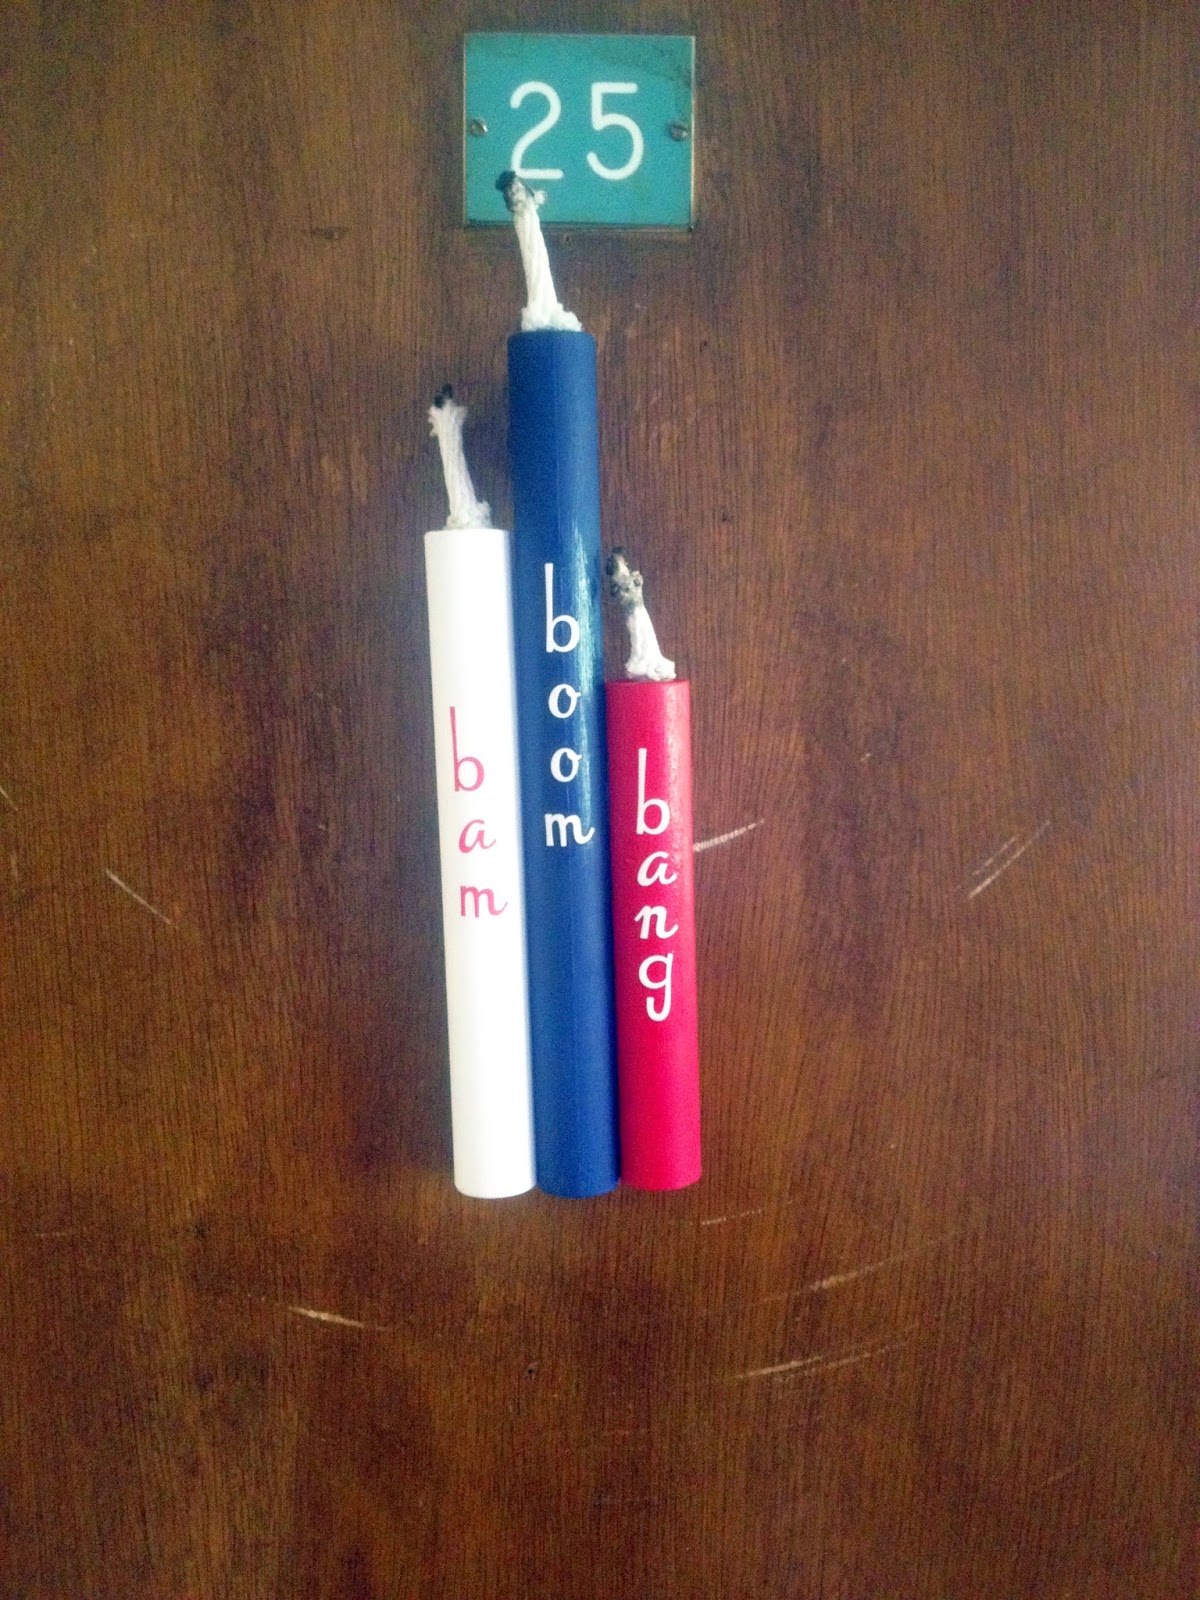
Hi everyone! No process video today. But I do have a quick, easy and cheap Fourth of July decoration that I wanted to share with you. I totally lost track of time and meant to post this sooner, but better late than never. And honestly, this project is so easy and the supplies are so accessible, you can do this with very little time.
First off, here is what I made:


First off, here is what I made:
The supplies were very simple and I had most of them on hand. You can buy everything for this at Wal-Mart. I used a dowel rod, red, white and blue paint, a foam brush, some clothesline, hot glue, a nail and some Independence Day fabric.
I started off by cutting my dowel rod into three pieces. I made mine 9 inches, 7 inches, and 5 1/2 inches. My husband cut these using his miter saw but you could easily hand saw these. Using a foam brush, I painted them each. It took about two thick coats of paint. It didn't take too long. I let them dry and went to work on the 'wicks.'
For the wicks, I cut some pieces of clothesline, but you could use any type of smaller rope. Or even some twine. Using our gas stove (or you could use a lighter), my husband held the three pieces over the flame until they became blackened on the end.
By this time, the 'firecracker' pieces were dry. I used some letter stickers that I had in my stash. I wish I would have had some blue ones, but I made these work. These happen to be from the Daily Flash collection by October Afternoon. I picked the words that I wanted to put on the firecrackers and then put them on. In hindsight, I would have chosen longer words. I put a little mod podge on top to seal them to the firecrackers as the letters had a tendency of peeling up. I'm not sure if this was because of the round shape, or because they didn't like sticking to paint.
Next up, use a glue gun to glue the pieces together. Make sure the bottoms line up. This isn't a huge deal if you're off, it just looks nicer :) Even though the back is definitely pretty ugly, haha!
Then I just cut a small piece of fabric from my stash. It happened to be Fourth of July themed, but you could use any pieces of red, white or blue fabric or ribbon. I nailed mine in, by myself, which is why it is going in at an angle and sticking out so far. But it works, and that's all that matters. And the front looks good, nobody is ever going to know what the back looks like. Unless they're nosy, and I can't help with that ;)
Here's the finished product again!
Like I said, this was a quick and cheap project for my Grandmother's door. I'm already thinking of what to do for August, but we'll see if I get that done any quicker!
Also, I have a giveaway going over on YouTube that ends July 3rd, so be sure to check that out!
Subscribe to:
Posts (Atom)