I purchased a lot of ribbon at Michael's. And even though it was forty percent off, it was still pricey. I definitely recommend trying to purchase ribbon when the holiday is over and the ribbon is deeply discounted! I made a fall wreath like this one and found a bunch of $1 ribbon at Wal-Mart, but no such luck with Valentine's Day ribbon. But shop around and find some cute ribbon that you like in a variety of widths and colors. You want a nice balance of colors in the varying widths also. So for instance, make sure you have red, white and pink in thin, medium and thick ribbon.
Here's a photo of the ribbon that I purchased. I actually ended up returning four of the thinner rolls of ribbon because I had too much and I probably could have returned another one or two because I had some ribbon leftover. Total I used 18 rolls of ribbon, mostly in medium and thick sizes.


Here's a photo of the ribbon that I purchased. I actually ended up returning four of the thinner rolls of ribbon because I had too much and I probably could have returned another one or two because I had some ribbon leftover. Total I used 18 rolls of ribbon, mostly in medium and thick sizes.
Hold back two rolls of ribbon in a thicker width. You'll use these for the wreath base. The thicker ribbons often have wired edges. I prefer not to cut these and put them through my sewing machine. I unwind the whole length of ribbon from the spool and then pull the wire out, one side at a time. My husband usually helps me. He will hold the ribbon and I pull the wire out. You'll get the hang out of it pretty quickly!
Then I started by cutting all of the ribbon into 4.5 inch strips. You don't have to be super precise and your cuts don't need to be perfectly straight. This is a perfect activity to do in front of the TV. If you have a rotary cutter and mat that is my preferred method. I couldn't find mine this time, so I just cut a strip of ribbon and used that as my guide to cut the rest of my strips and I used fabric scissors. Easy peasy! Here's my ribbon after it was all cut
Next, start sewing the strips together. There are several ways you could get your 'loops' of ribbon, but I found sewing to be the cheapest and quickest. I don't like using hot glue, but that's definitely an option. I just put the wrong sides together to make a loop and then run it through my machine. I don't cut mine off in between, I leave them in a long chain so the pieces are all stitched together. This is a cute idea for a banner also!
Here's my pile after they were all sewn together:
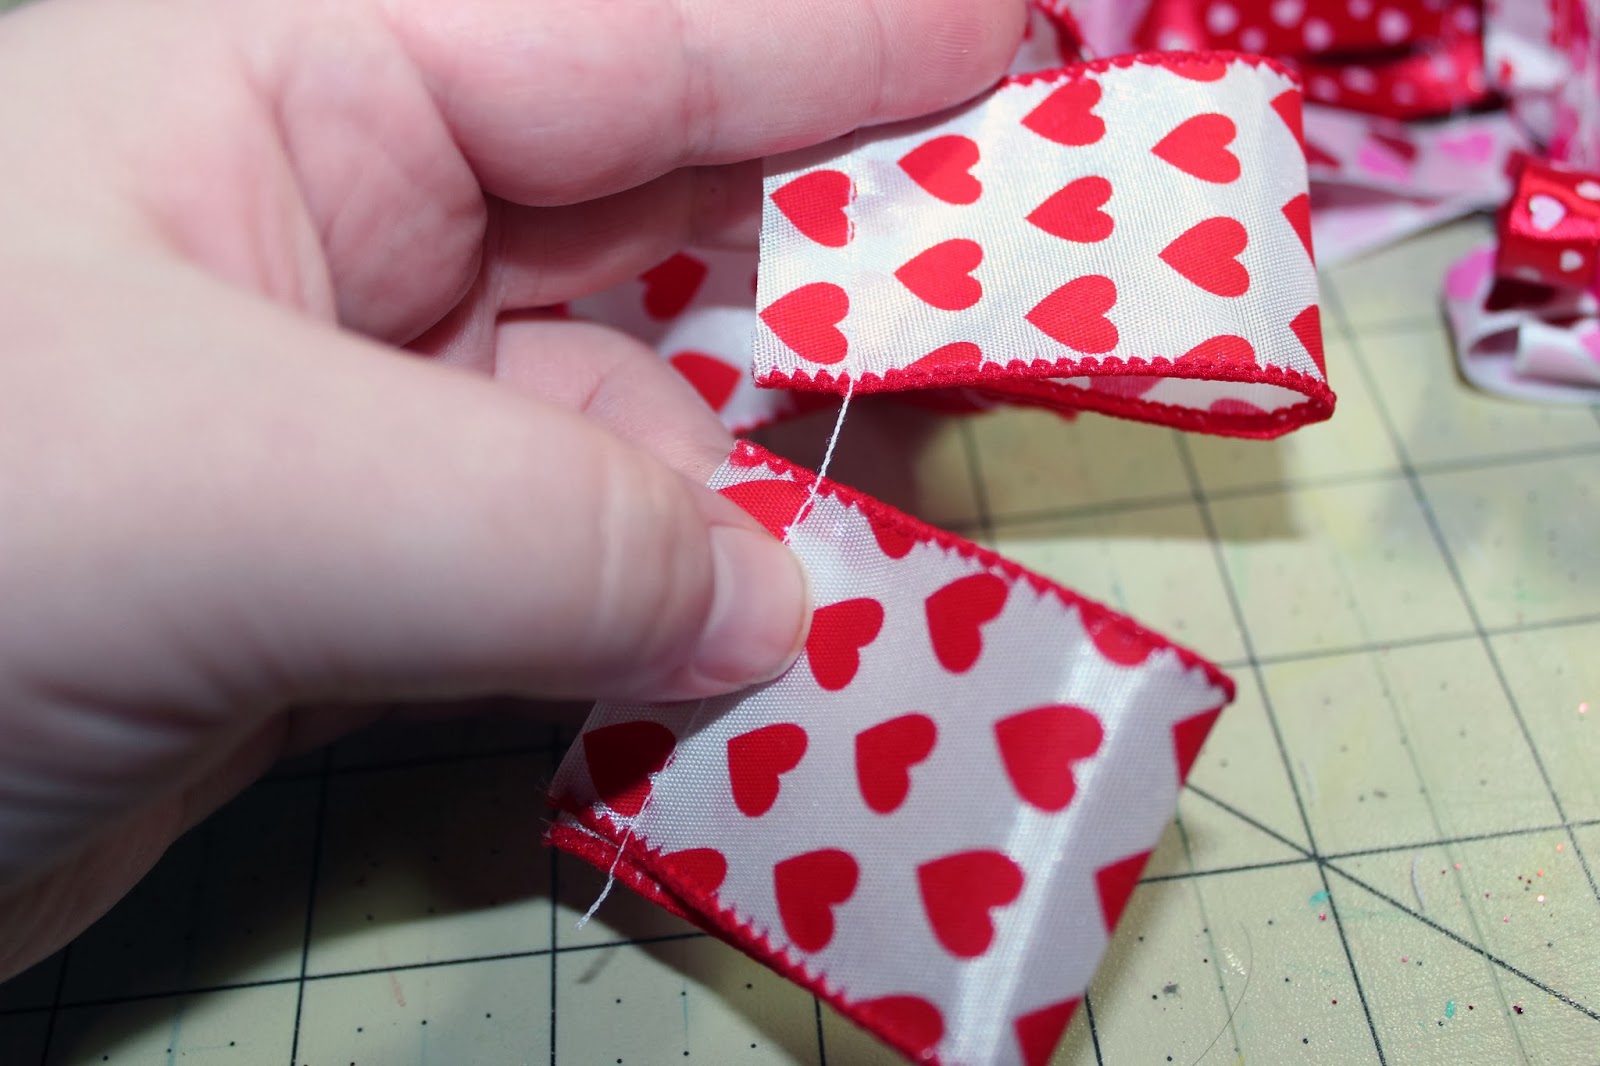
This shows you how they look stitched together. I just go in with my scissors and clip as close to the ribbon as I can and snip them apart! If you follow me on Instagram at kelseydnoble you will see that my dog helped me out while I was cutting these apart in front of the TV one night.
I purchased my wreath in the floral department at Michael's with a coupon. I have heard that some dollar stores have wreaths and I would recommend getting one there if the quality is decent. Depending on what color of wreath you have, you'll probably want to cover it with ribbon. Even though you cover the entire wreath with the 'loops' there is some space that shows through unless you really pack the loops in tightly! To save on ribbon costs, you can use a little less ribbon for the loops if you cover the wreath with a complementary ribbon color. It's much nicer to see a little white or red peeking through than if you could see the wreath underneath.
To secure the ribbon to the wreath use a dab of hot glue at the beginning and then just wrap the ribbon around, overlapping slightly each time until the entire wreath is covered. You will need two rolls of ribbon for a wreath this size.
The next step is to start putting all those loops in place! My preferred method is straight pins. I buy them at Wal-Mart in the sewing section. The pins allow you to be flexible, if you have too many ribbons in one place, you can always unpin them and move them around.
As you are pinning (or gluing) the loops in place, remember that you want to cover the inner ring well so that when the wreath is hanging up, you won't see the ribbon underneath. Vary the different colors and widths as you go along. My method is to go around the wreath in pieces. I start on the inner ring and go all the way around. Then I go to the outer side of the wreath and go all the way around there. Then I fill in the middle. After it's all done, I look for places that need filling in. The thinner pieces of ribbon are good for filling in spots at the end.
To hang your wreath, simply use a piece of twine! I chose pink and white (it's hard to see in the picture) but red, white, or brown twine would work just as well. Hang on a nail or hook! Here it is hanging in Irene's room after it was all finished!
I hope everyone enjoyed this tutorial! If you have any questions please leave them in the comment section below and I will answer them as soon as possible. I'll be back tomorrow with a video!
No comments:
Post a Comment